
KoboldAI does not support GGML/GGUF models. For GGML/GGUF support, see KoboldCPP.
KoboldAI is a backend for text generation which serves as a gateway for model text writing.
¶ Features
- Themeable UI for story writing.
- KoboldAI Lite (KAI Lite) UI for Chat, Instruct and Story Writing.
- Character Card support inside the KAI Lite) UI.
- World Info support.
- Adventure mode for text adventures.
- 16-bit, 8-bit and 4-bit support both HF for 16-bit models and GPTQ
- Protects you from malicious models
- Image generation
- LUA scripting
- Horde integration (Help others by hosting on Horde)
- Easy API for your own software.
¶ Installation
¶ Windows
Make sure you don't have a
B:drive.
Download KoboldAI from the link below and run the Windows installer.
Once KoboldAI finishes installing, run the shortcut that has been placed in your Desktop or Start Menu to launch KoboldAI.
¶ Linux
Make sure you have
gitinstalled on your system.
Do not install KoboldAI using administrative permissions.
- Clone the Github repository for KoboldAI.
git clone https://github.com/henk717/KoboldAI && cd KoboldAI
- Run install_requirements.sh with either of the following argurments.
./install_requirements.sh cuda # For NVIDIA
./install_requirements.sh rocm # For AMD
- Launch KoboldAI using
./play.sh # Running via Localhost
./play.sh --host <ip addr> # Running via Local Network
./play.sh --remote # Running via Cloudflare Links (outside home)
Replace
<ip addr>with the IP you want to whitelist so your KoboldAI instance is secure.
¶ Using KoboldAI as an API for Frontend Systems
To use KoboldAI as a backend for frontend systems like SillyTavern:
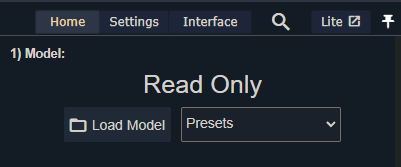
- Click on Load Model.
- Click on Load a model from it's directory.
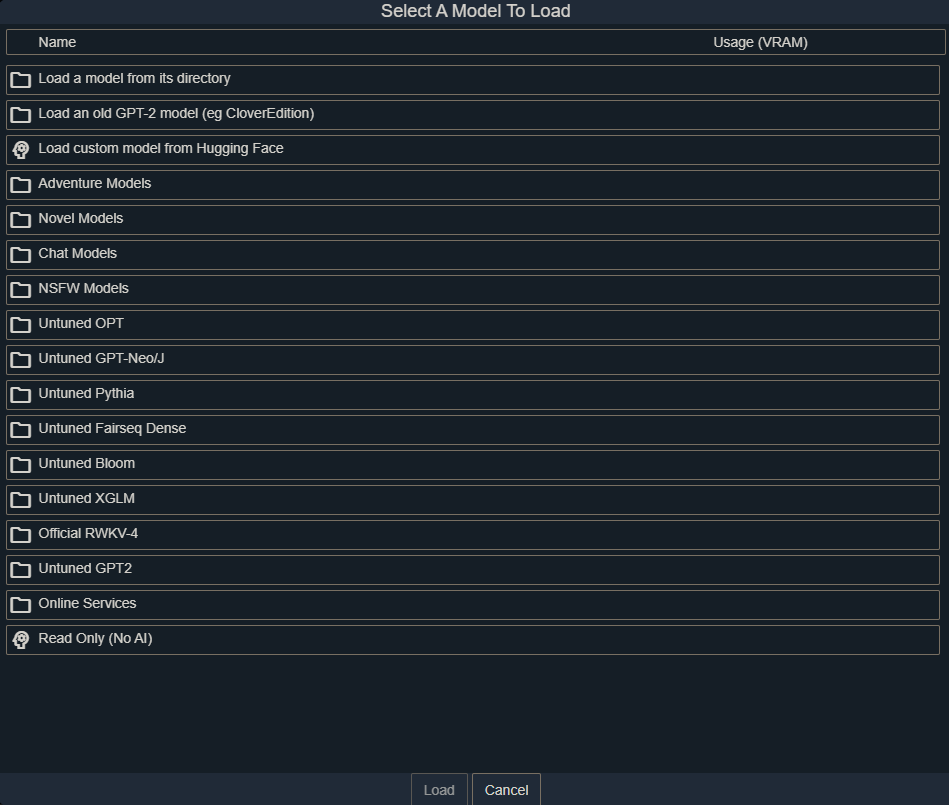
If you have yet downloaded a model, you may download one via the several options below, starting with Adventure Models.
- Select the model you wish to load, adjust the number of GPU layers to assign the model and click Load.
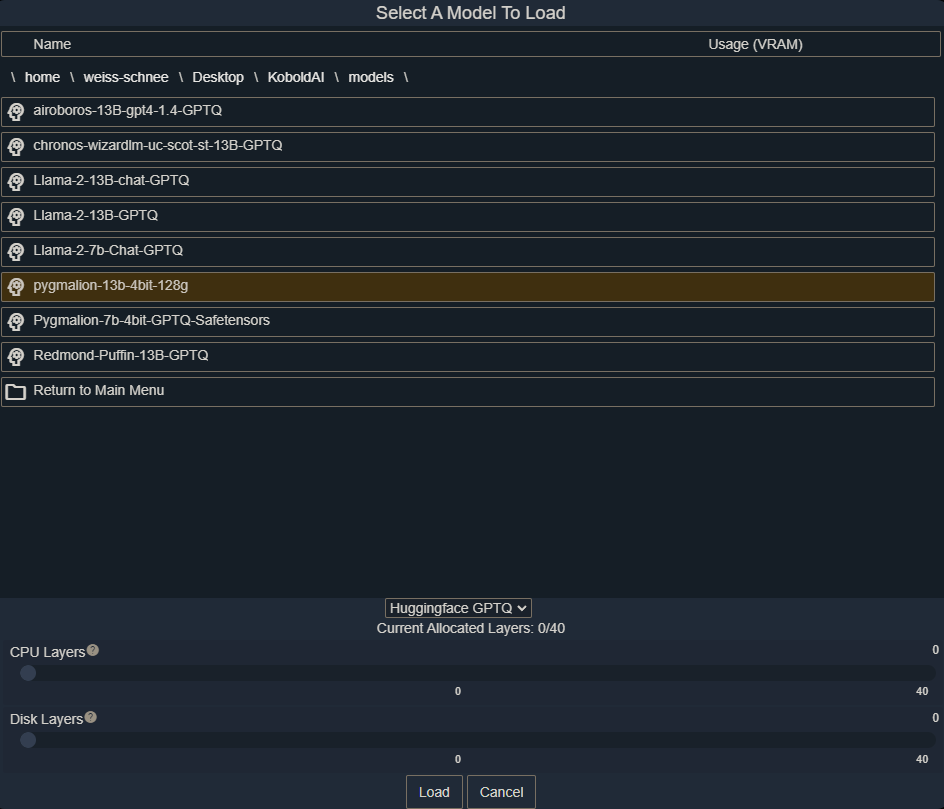
The general idea here is that you should allocate all the layers you can on your GPU (GPU Layers) before resorting to CPU Layers. This will be a lot of trial and error but once you stop hitting CUDA_OUT_OF_MEMORY issues, you should be good to go.
Do not put any layers on disk.
¶ SillyTavern
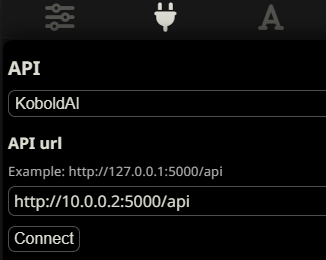
Go back to SillyTavern, go to API Connections, select KoboldAI (not KoboldAI Horde) configure the link to your KoboldAI location and click Connect.
¶ Installing Models
KoboldAI supports both automatic downloads and manual downloads. See either section for your use case.
¶ Automatic Download
At the time of writing, KoboldAI's automatic downloader only supports 16-bit HF (HuggingFace) models which it will automatically convert to 4-bit as it loads. If you wish to download a GPTQ (4-bit) model see Manual Download.
- Click on Load Model.

- Click on Load custom model from Hugging Face.
- Type in the model name in the HuggingFace model textbox, configure your layers and click Load.
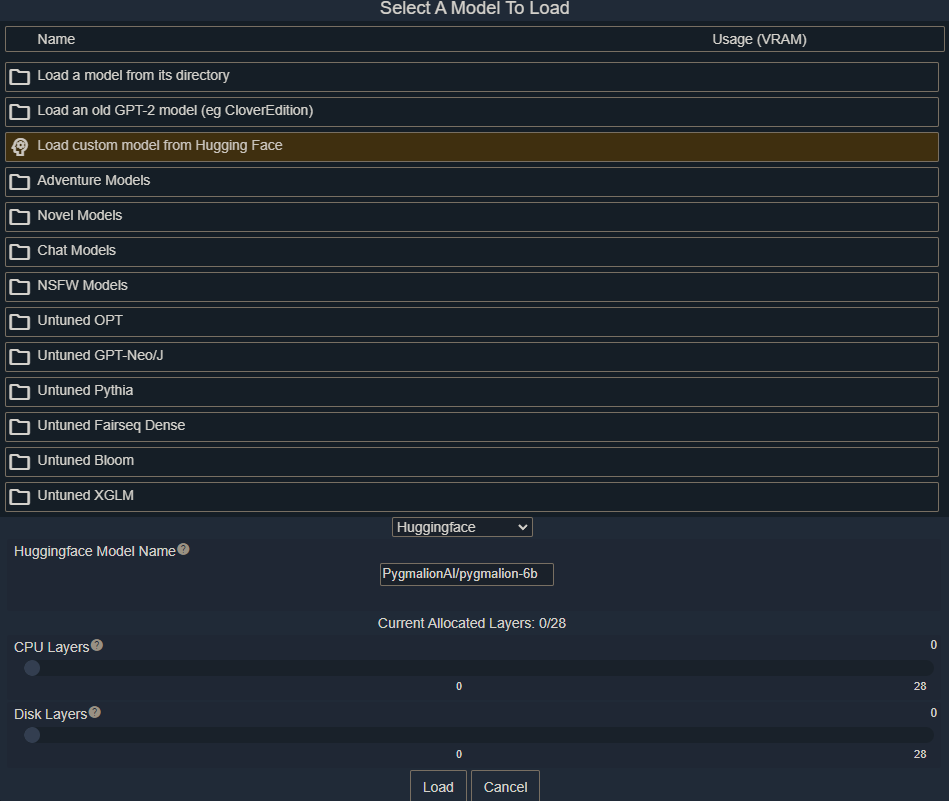
The same suggestions explained for the API applies here as well.
¶ Manual Download
Download a model of your choosing or from LLM Models following this guide.